Are you ready to dive into the world of 3D printing? To ensure successful prints, you’ll need the right tools. In this article, we’ll guide you through the must-have equipment for 3D printing. From filament storage and maintenance accessories to print bed adhesion tools, print removal and post-processing tools, and precision and measurement tools, we’ve got you covered. Whether you’re a beginner or an experienced 3D printer owner, this comprehensive guide will help you build your toolkit and achieve high-quality prints. Let’s get started on your 3D printing journey!
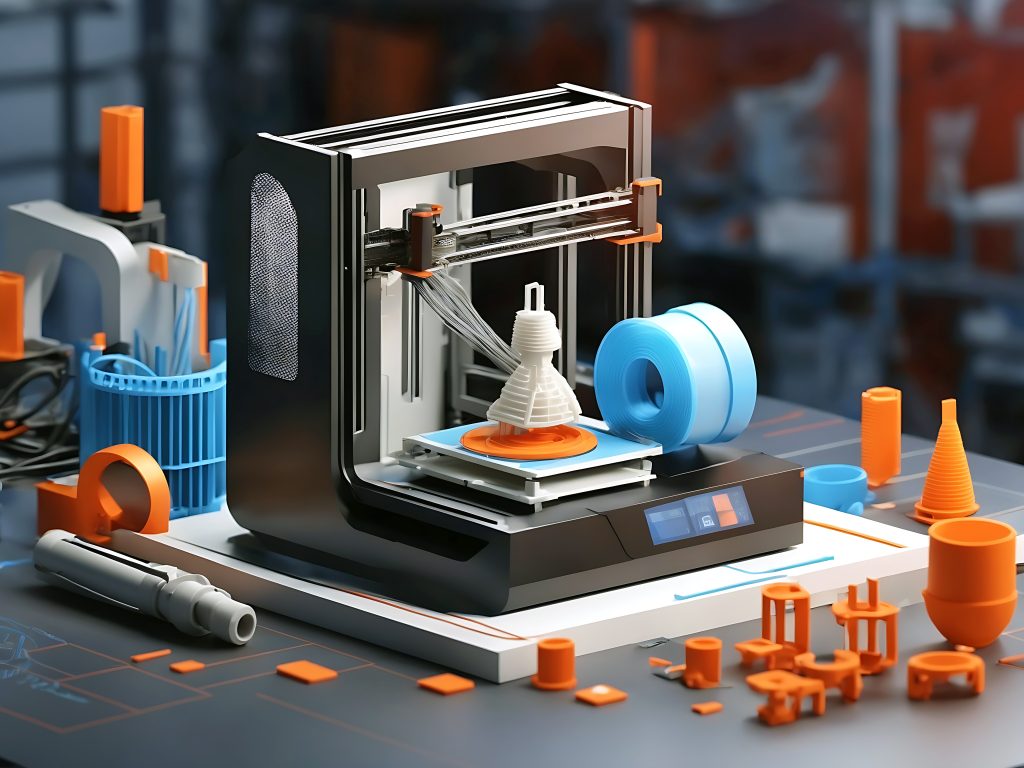
Filament Storage and Maintenance Accessories
To ensure the longevity and quality of your filament, you’ll need to invest in filament storage and maintenance accessories. Filament storage solutions are crucial for protecting your filament from moisture and other environmental factors that can degrade its quality. One option is to use a filament storage container with a temperature and humidity sensor, which allows you to monitor the conditions inside the container. Vacuum sealed storage containers are also effective in keeping moisture out and maintaining a moisture-free environment. It is important to have a filament storage container with an airtight seal to prevent any air or moisture from entering. Additionally, using a transparent design for your storage containers allows for easy filament identification. When it comes to improving the finish of your filament, there are techniques you can utilize such as using acetone and XTC-3D high-performance coating. These solutions can help smooth out the surface of your prints and enhance their overall appearance. By investing in these filament storage and maintenance accessories, you can ensure the quality and longevity of your filament, ultimately leading to better 3D prints.
Print Bed Adhesion Tools
For achieving optimal print bed adhesion, you’ll need a combination of masking tape, Kapton tape, PVA glue stick, and hair spray. These tools are essential for ensuring that your 3D prints adhere securely to the print bed, resulting in successful and high-quality prints. Here are some key points to consider when it comes to print bed adhesion:
- Kapton tape alternatives: While Kapton tape is commonly used for its heat resistance and reduced warping properties, there are alternatives available such as PET tape or blue painter’s tape. These options can provide similar adhesion benefits at a lower cost.
- Tricks for better bed adhesion: To improve bed adhesion, you can try cleaning the print bed surface with isopropyl alcohol before applying any adhesion tools. Additionally, increasing the print bed temperature and using a brim or raft can help promote better adhesion.
- Heat resistant adhesion solutions: If you’re working with high-temperature materials, it’s important to use adhesion solutions that can withstand the heat. Kapton tape, PET tape, or specialized high-temperature adhesives can be used to ensure proper adhesion.
- Exploring different print bed surfaces: In addition to using adhesion tools, you can also experiment with different print bed surfaces. Some options include glass, PEI sheets, or adhesive-backed build surfaces, each providing unique adhesion characteristics.
- Adhesion troubleshooting techniques: If you’re facing adhesion issues, some troubleshooting techniques include adjusting the print bed level, increasing the nozzle temperature, or using a brim or raft to provide additional support.
Print Removal and Post-Processing Tools
When it comes to removing your 3D prints from the print bed and post-processing them, you’ll need a set of essential tools that make the process easier and more efficient. Print removal techniques and post-processing methods are crucial for achieving high-quality prints. After removing the print from the bed, you’ll need to perform finishing touches to refine the appearance and functionality of your 3D prints. Post-print cleaning ensures that any support structures or residue are removed, resulting in a clean and polished final product. Additionally, tool maintenance is important to ensure that your tools remain in good working condition and last for a long time.
To emphasize the importance of print removal and post-processing tools, here is a table that highlights some essential tools in this category:
| Tool | Description |
|---|---|
| 3D print removal tool | Set of thin, angled spatulas for easy and safe removal of prints from the print bed. |
| Carving tools | Set of 12 with varying shapes and sizes for precise post-processing and detail work. |
| Diamond needle file set | Ideal for delicate projects, this set allows for precise filing and shaping of 3D prints. |
| Sandpaper | Set with coarse to fine grit for smoothing rough surfaces and achieving desired finish. |
| Rotary tool | Provides easier and more accurate post-processing by allowing for detailed carving, sanding, and polishing. |
Tools for Maintenance and Troubleshooting
You will need various tools for maintenance and troubleshooting to ensure smooth operation and address any issues that may arise with your 3D printer. Here are some essential tools to have on hand:
- Nozzle cleaning kit: This kit includes cleaning needles and brushes to effectively clean clogged or dirty nozzles, ensuring proper filament flow and print quality.
- Troubleshooting common print issues: Familiarize yourself with common print issues such as stringing, layer shifting, and under-extrusion. Use online resources and forums to troubleshoot and find solutions.
- Maintaining print bed levelness: A level print bed is crucial for successful prints. Use a digital caliper to check the levelness of your bed and adjust it accordingly.
- Optimizing print settings: Experiment with different print settings such as layer height, print speed, and temperature to achieve the best results for your specific filament and model.
- Preventing filament jams: Filament jams can occur when the filament gets stuck in the extruder or nozzle. Regularly check and clean your extruder and use filament dryers to prevent moisture-related issues.
Tools for Precision and Measurement
To ensure accurate and precise 3D prints, several tools are essential for precision and measurement. One such tool is the digital caliper. A digital caliper is a vital tool for detail-oriented 3D print makers, allowing for precise measurements of dimensions and ensuring the accuracy of the final printed object.
In addition to the digital caliper, having extra print beds is important for successful prints and as backup options. Print beds can become damaged or worn over time, so having extras on hand ensures that printing can continue uninterrupted.
To improve print quality and reduce warping, a print cooling fan is a valuable tool. This fan helps to cool the printed layers quickly, resulting in better-defined details and smoother surfaces.
To provide better visibility during the printing process, an LED lighting kit can be utilized. This kit illuminates the printing area, allowing for easier monitoring and inspection of the print as it progresses.
Lastly, using anti-vibration pads can help reduce vibrations and noise during the printing process. These pads absorb and dampen vibrations, leading to improved print quality and overall printer performance.
Accessories for Print Quality Improvement
To improve the quality of your 3D prints, consider utilizing accessories that enhance print precision and minimize imperfections. These accessories can make a significant difference in the final outcome of your prints. Here are five accessories that can help you achieve better print quality:
- Filament drying methods: Moisture can negatively affect the quality of your prints. Filament drying methods, such as using a filament dryer or desiccant dehumidifiers like silica gel packets, can help remove excess moisture from your filament, resulting in better print quality.
- Print cooling fans: Print cooling fans are essential for reducing warping and improving print quality. They help to quickly cool down the printed layers, preventing overheating and ensuring better layer adhesion.
- LED lighting kits: Proper lighting is crucial for monitoring your prints and identifying any imperfections. LED lighting kits provide bright and even illumination of the printing area, allowing for better visibility and quality control.
- Digital thermometers: Monitoring the temperature is essential for successful 3D printing. Digital thermometers enable you to accurately measure the ambient temperature and print bed temperature, ensuring optimal printing conditions.
- Nozzle cleaning kits: A clean nozzle is essential for achieving precise and high-quality prints. Nozzle cleaning kits, which include cleaning needles and brushes, help you remove any debris or clogs from the nozzle, ensuring smooth and consistent extrusion.
Accessories for Vibration Reduction and Noise Control
To further enhance the quality of your 3D prints, it is important to consider accessories that can help reduce vibration and control noise during the printing process. Excessive vibration can negatively impact print quality and lead to inaccuracies in the final product. Noise can also be a concern, especially in shared spaces or when printing for extended periods. To address these issues, you can utilize anti-vibration pads, which are designed to reduce vibrations and absorb shock. These pads are typically made from materials such as rubber or silicone and can be placed under your 3D printer to minimize vibrations. Additionally, noise reduction solutions such as noise dampening materials can be used to absorb and reduce the sound generated during printing. These materials are often made from foam or other sound-absorbing substances and can be placed around the printer to help control noise levels. By implementing these vibration control techniques and silent printing methods, you can achieve better print quality and a quieter printing experience.
Additional Tools for Finishing and Assembly
When finishing and assembling your 3D prints, it is essential to have the right tools at your disposal. Here are some additional tools that can help you achieve a professional finish and seamless assembly:
- 3D pen: A 3D pen allows you to add detailed touches and make repairs to your prints by extruding filament in a controlled manner.
- Deburring tool: This tool helps you remove any rough edges or burrs left behind after printing, ensuring a smooth and polished finish.
- Cordless rotary tool: With different attachments, a cordless rotary tool can be used for sanding, polishing, and cutting, providing precision and versatility in post-processing.
- Filament dryers: Filament dryers are used to remove moisture from filament, preventing issues like bubbling and uneven printing. They help maintain the quality of your prints.
- Settings for 3D printer nozzle sizes: Adjusting the settings on your 3D printer to match the nozzle size you are using is crucial for achieving accurate and high-quality prints. It ensures proper extrusion and layer adhesion.
Additional 3D Printer Accessories
Now let’s talk about some additional 3D printer accessories that can enhance your printing experience. One essential accessory is a filament storage container, which helps maintain the quality of your filament by providing a moisture-free environment. Another useful tool is masking tape, which can be used as a print bed adhesion tool to ensure your prints stick securely. Additionally, a PVA glue stick is a washable and versatile option for improving adhesion on a variety of materials. To safely remove your prints from the build plate, a 3D print removal tool and a set of carving tools can come in handy.
Filament Storage Container
You will need an airtight filament storage container as an additional 3D printer accessory. This container is essential for maintaining the quality of your filament over time. Here are the key features to look for in a filament storage container:
- Temperature control: The container should have the ability to maintain a stable temperature to prevent filament from degrading.
- Humidity monitoring: It should have a built-in humidity sensor to ensure that the moisture level inside the container remains low.
- Vacuum sealing: A vacuum-sealed design is important to keep the filament free from moisture and dust.
- Filament identification: Look for a container with a transparent design, allowing you to easily identify the type and color of filament stored inside.
- Airtight seal: The container should have a tight seal to prevent air from entering and compromising the quality of the filament.
Investing in a good filament storage container will help prolong the lifespan and quality of your filament, ensuring successful and high-quality 3D prints.
Masking Tape
To ensure optimal bed adhesion and reduce warping, an essential additional 3D printer accessory to consider is masking tape. Masking tape provides a reliable surface for your prints to adhere to, especially when working with materials that have difficulty sticking to the print bed. It is available in different widths to accommodate various print sizes. However, if you find that masking tape is not suitable for your specific material, there are alternative options such as Kapton tape, which is designed for high temperature prints and helps to minimize warping. When it comes to removing masking tape, it is recommended to peel it off slowly and at a low angle to avoid damaging the print. For large prints, using multiple strips of masking tape can provide better coverage and adhesion. Overall, masking tape is a versatile and valuable tool for improving bed adhesion and ensuring successful prints.
PVA Glue Stick
When preparing your print bed for optimal adhesion, one essential additional 3D printer accessory to consider is using a PVA glue stick. This versatile tool can help improve bed adhesion and prevent warping during the printing process. Here are some key points to keep in mind when using a PVA glue stick:
- Troubleshooting tips: If you’re experiencing issues with adhesion, try applying multiple layers of glue or adjusting the temperature settings on your printer.
- Alternative adhesion methods: While a PVA glue stick is a popular choice, other options like masking tape or a specialized bed adhesive can also be effective.
- Best practices for application: Apply a thin, even layer of glue to the print bed before starting the print. Allow it to dry completely before printing.
- Removing residue: After the print is complete, gently wash the print bed with warm water to remove any leftover glue residue.
- Compatibility with different materials: PVA glue sticks are generally compatible with most 3D printing materials, but it’s always a good idea to check the manufacturer’s recommendations for specific filaments.
3D Print Removal Tool
The 3D print removal tool is an essential accessory for easily and safely removing your 3D prints from the print bed. When it comes to 3D print removal techniques, using a removal tool can help prevent damage to your prints and the print bed. The thin, angled spatulas in a print removal tool set allow you to carefully pry and lift your prints without causing any undue stress or strain. This tool is especially useful for troubleshooting common print issues such as warping or adhesion problems. Additionally, the print removal tool is a crucial part of effective post-processing methods, as it allows you to easily access and clean up your prints. By using the print removal tool correctly, you can ensure proper bed adhesion and maintain the longevity of your printer.
Carving Tools
Carving tools are an essential addition to your 3D printer owner’s toolkit, allowing you to refine and add intricate details to your prints. Here are some key points to consider when using carving tools:
- Carving Techniques: Experiment with different techniques such as scraping, etching, and sculpting to achieve the desired effect on your prints.
- Tool Maintenance: Keep your carving tools clean and sharp to ensure precise and clean cuts. Regularly sharpen the blades and remove any debris or buildup.
- Safety Precautions: Always wear protective gloves and goggles when using carving tools to prevent injuries. Work in a well-ventilated area to avoid inhaling any dust or particles.
- Advanced Carving Tools: Consider investing in advanced carving tools such as micro chisels, precision knives, and rotary tools to achieve even more detailed and intricate designs.
- Carving Tool Storage: Properly store your carving tools in a dedicated case or organizer to keep them organized and protected from damage.
Essential Tools for 3D Printing at Work
To ensure smooth and efficient 3D printing at work, you will need a range of essential tools. In an office setup, it is important to optimize your workflow to save development time. To achieve this, you can implement various buy-in strategies, such as providing a free in-depth white paper on the power of 3D printing at work and offering tips on getting buy-in from everyone in the office. Additionally, it is crucial to consider important setup considerations for successful 3D printing, including the proper placement and calibration of your printer. Workflow options that can save development time include using pre-made tool sets, utilizing print removal tools like spatulas, and investing in a nozzle cleaning kit for easy maintenance. To streamline the process further, you can employ knife clean-up kits and tweezers for precise adjustments. These tools, along with tips and tricks for 3D printing at work, will help you achieve efficient and high-quality prints in your professional environment.