So, you’ve heard about this magical thing called vase mode in 3D printing. Well, get ready to be amazed! With vase mode, your printer can create stunningly seamless objects like vases, bowls, and cups with just a single wall thickness. And the best part? It’s faster, saves materials, and opens up a whole new world of creativity. But before you dive in headfirst, there are a few drawbacks to consider. Don’t worry though – we’ve got you covered with a step-by-step guide and tips for successful printing in vase mode using Cura software. Let’s explore the possibilities together!
The Basics of Vase Mode Printing
Vase mode is a special printing setting that creates hollow objects with a single continuous wall, reducing print time and material usage. When using vase mode in 3D printing, you can create stunning designs with intricate patterns and shapes. By eliminating the need for infill or top/bottom layers, vase mode allows for faster printing compared to traditional solid prints. This means you can produce more objects in less time. Additionally, vase mode reduces material waste, making it a more sustainable option. To get started with vase mode, make sure you have proper ventilation in your printing area to ensure safety. Familiarize yourself with the vocabulary specific to 3D printing and watch helpful video tutorials that demonstrate the process step-by-step. With practice and experimentation, you’ll be able to create impressive prints using vase mode.
Advantages of Vase Mode in 3D Printing
To maximize your 3D printing efficiency, you’ll appreciate the time-saving and material-saving benefits of utilizing Vase Mode in 3D printing. Here are some advantages of using Vase Mode:
- Faster Printing: Vase mode significantly reduces print time compared to traditional solid prints.
- Material Savings: Vase mode uses less material compared to solid prints, resulting in cost savings and reduced material waste.
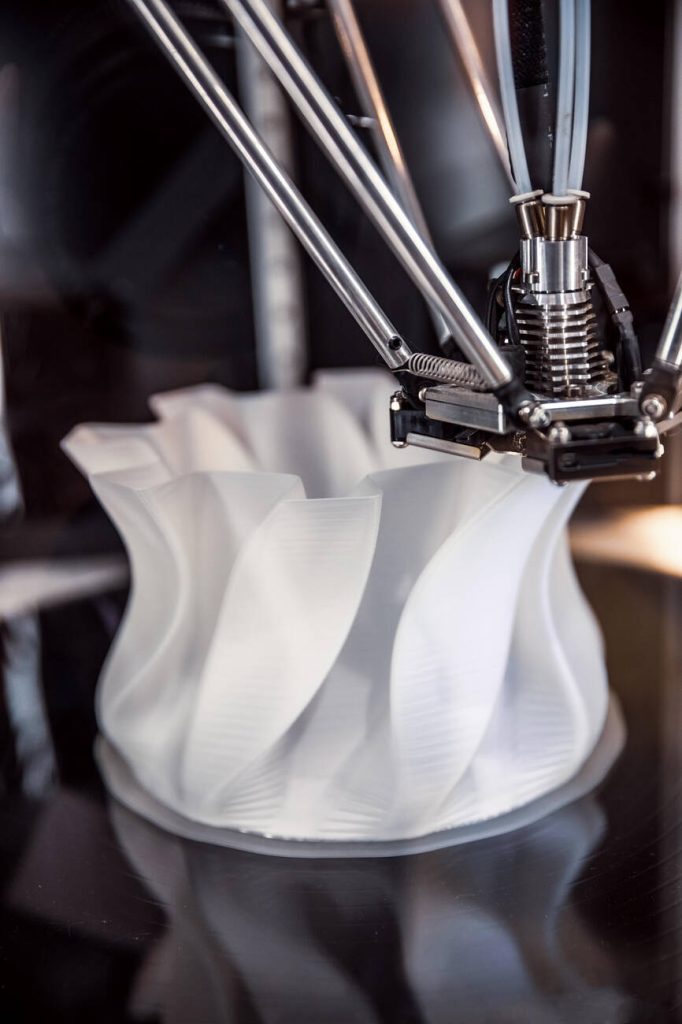
- Unique Aesthetic: Vase mode allows for the creation of visually appealing objects with a continuous spiral structure.
Step-by-Step Guide to Printing in Vase Mode
Start by selecting a suitable hollow model with a single outer wall and no inner geometry. This is important because vase mode printing requires a specific type of model to ensure successful results. Once you have chosen the right model, load it into slicing software and choose the vase mode setting. Adjust the settings such as layer height, number of bottom layers, and wall thickness according to your desired print quality and strength. It’s also essential to optimize other print settings like speed, temperature, and cooling for smooth printing. After all the adjustments are made, start the print and closely monitor the process for any issues or adjustments needed. Remember that vase mode printing has its limitations compared to other methods like resin printing or CNC machining, so always consider your specific needs and requirements when deciding which method to use.
Drawbacks and Challenges of Vase Mode Printing
Avoiding complex or intricate designs may be challenging in vase mode printing as it may not accurately reproduce intricate details or complex structures. However, despite this limitation, vase mode printing offers several benefits and opportunities for creativity:
- Time and Material Efficiency: Vase mode significantly reduces print time and material usage compared to traditional solid prints.
- Unique Aesthetic Appeal: Vase mode allows for the creation of visually appealing objects with a seamless spiral structure.
- Enhanced Creativity: Vase mode expands design possibilities and enables the production of unique and innovative objects.
While there are drawbacks to vase mode printing, such as reduced structural strength and limited surface finish options, understanding its limitations can help you optimize your designs and achieve successful prints. So embrace the challenges and unleash your creativity with vase mode printing!
Tips for Successful Vase Mode Printing
Choose suitable models that have simple and hollow geometries for successful prints in vase mode. When selecting a model, look for designs that don’t have intricate details or complex structures, as vase mode is best suited for simple shapes. Optimize your settings by adjusting the layer height, number of bottom layers, and wall thickness to achieve the desired print quality and strength. Make sure to ensure proper bed adhesion to prevent any issues during printing. Continuously monitor the print progress to address any potential problems that may arise. And finally, consider utilizing post-processing techniques such as sanding or painting to enhance the surface finish of your vase mode prints. By following these tips, you can achieve beautiful and successful prints using vase mode in 3D printing.
Exploring Vase Mode in Cura: Benefits and Features
To get the most out of Cura, take advantage of the benefits and features offered by Vase Mode. Here’s what you need to know:
- Seamless and Aesthetic Prints: Vase Mode in Cura allows you to create stunning 3D prints with a continuous spiral structure, resulting in visually appealing objects.
- Material and Time Savings: With Vase Mode, you can reduce material usage and print time compared to standard settings, making it an efficient option for your projects.
- Single Wall Thickness: Vase Mode builds models with a single wall thickness, giving your prints a unique look.
Activating and Using Vase Mode in Cura
Activating and using Vase Mode in Cura is a straightforward process that allows you to create seamless and visually appealing 3D prints. To get started, find the Vase Mode function in Cura and activate it for your print. Once activated, you can adjust the settings and parameters to achieve the desired results. Experiment with different designs and shapes using Vase Mode to explore its full potential.
Here is a table that outlines the step-by-step process of activating and using Vase Mode in Cura:
| Steps | Description |
|---|---|
| Find Vase Mode | Locate the Vase Mode function in Cura’s interface. |
| Activate Vase Mode | Enable the Vase Mode setting for your specific print. |
| Understand Settings | Familiarize yourself with the available settings and options in Vase Mode. |
| Adjust Parameters | Modify parameters such as layer height, number of bottom layers, and wall thickness according to your preferences. |
Tips for Using Vase Mode in Cura
When using Vase Mode in Cura, it is important to select suitable models with smooth surfaces for successful prints. Here are some tips to help you get the best results:
- Choose Suitable Models:
- Look for models that have simple and hollow geometries.
- Avoid complex or intricate designs that may not work well in Vase Mode.
- Ensure the model has a continuous and smooth surface.
- Optimize Print Settings:
- Adjust layer height and print speed to achieve better results.
- Experiment with different settings to find the optimal ones for your specific print.
- Test and Iterate:
- Don’t be afraid to test different designs and shapes using Vase Mode.
- Learn from each print and make adjustments as needed.
Expanding Design Possibilities With Vase Mode
By experimenting with different shapes and designs, you can unlock a world of creative possibilities when using Vase Mode in 3D printing. With Vase Mode, you can create unique and artistic vases with intricate patterns that would be difficult to achieve using traditional printing methods. The continuous spiral structure allows for the production of decorative objects with delicate details, adding an elegant touch to your prints. Additionally, Vase Mode opens up the potential for functional prints such as cups or bowls with a seamless appearance. You can even combine Vase Mode with other printing techniques to create hybrid designs that push the boundaries of creativity. Don’t hesitate to share your Vase Mode creations and inspire others in the 3D printing community!
Additional Resources and Support for Vase Mode Printing
Now that you have learned about expanding design possibilities with vase mode in 3D printing, it’s time to explore additional resources and support for this printing technique. These resources can provide valuable information, tips, and inspiration to enhance your vase mode prints. Here are some ways you can find the help you need:
- Official Cura Website:
- Visit the official Cura website for documentation and tutorials on vase mode.
- Online Forums and Communities:
- Join online forums and communities dedicated to 3D printing to learn from experienced users of vase mode.
- YouTube Video Tutorials:
- Watch video tutorials on YouTube that demonstrate vase mode in action.