Are you ready to dive into the fascinating world of 3D printing? This step-by-step tutorial will guide you through the process of getting started. From choosing the right printer to understanding the printing process, we’ll provide valuable insights and tips along the way. Whether you’re a hobbyist, entrepreneur, or simply curious, this article will equip you with the knowledge and skills to unleash your creativity. Get ready to explore the endless possibilities of 3D printing. Let’s embark on this exciting journey together!
Choosing the Right 3D Printer
To choose the right 3D printer, you need to consider your specific needs and requirements. Start by researching the best 3D printer brands that offer high-quality and reliable machines. Look for printers with specifications that align with your intended use, such as print volume, resolution, and filament compatibility. It’s also important to consider the printer’s ease of use and customer support. Troubleshooting common printer issues is another factor to consider, as technical problems can arise during the printing process. Look for printers that have a strong support community and readily available troubleshooting resources. Additionally, optimizing print settings is crucial for achieving the desired print quality. Experiment with different settings such as layer height, infill density, and print speed to find the optimal balance between speed and quality. Lastly, compare different printing materials to choose the one that best suits your needs. Consider factors such as strength, flexibility, and heat resistance. By carefully considering these factors, you can select the right 3D printer that meets your specific needs and ensures successful printing outcomes.
Understanding the Components of a 3D Printer
To understand the components of a 3D printer, start by familiarizing yourself with the key parts that make up this innovative technology. Here are the main components you need to know:
- 3D Printer Types:
- Fused Deposition Modeling (FDM): The most common and widely used 3D printing technology.
- Stereolithography (SLA): Uses a laser to solidify liquid resin layer by layer.
- Selective Laser Sintering (SLS): Utilizes a high-powered laser to fuse powdered material together.
- Digital Light Processing (DLP): Similar to SLA but uses a projector instead of a laser.
- Binder Jetting: Binds layers of powder with a liquid binder.
- Modeling Software: Programs used to create digital models of the object you want to print. Examples include AutoCAD, SolidWorks, and Fusion 360.
- Slicing Software: Converts the digital model into instructions for the 3D printer. It calculates the route and filament required for printing. Popular slicing software includes Cura, Simplify3D, and ideaMaker.
- High-End Industry Applications: 3D printing is revolutionizing industries like aviation, aerospace, and military. It enables the production of lightweight and complex components, rapid prototyping, and customization. It also reduces lead times and production costs.
Understanding these components will give you a solid foundation for exploring and utilizing the capabilities of a 3D printer.
Step 1: Digital Modeling
Start by creating a digital model of your desired object to begin the process of 3D printing. Digital modeling is a crucial step that involves using specialized software to design your object in a virtual environment. There are various digital modeling techniques you can utilize, depending on your level of expertise and the complexity of your design.
When it comes to digital modeling software, there are several options available. It is essential to compare different 3D modeling software to find the one that best suits your needs. Some popular choices include Autodesk Fusion 360, SketchUp, and Blender. Each software has its own set of features and capabilities, so it is important to consider your specific requirements before making a decision.
If you’re not confident in your modeling skills or don’t have the time to create a model from scratch, you can also explore popular online 3D model repositories. These repositories offer a wide range of pre-designed models that you can download and modify to fit your needs.
While creating your digital model, it’s important to be aware of common modeling errors that can affect the quality of your final print. Troubleshooting these errors and ensuring that your model is watertight and properly scaled will help prevent any issues during the printing process.
For more advanced modeling techniques, you can explore features like parametric modeling, sculpting, and mesh editing. These techniques allow for more intricate and detailed designs.
Step 2: Slicing the Model
To slice the model, you will need to use slicing software to prepare your digital model for 3D printing. Slicing software, such as ideaMaker, plays a crucial role in the 3D printing process by converting the digital model into instructions that the printer can understand. Here are some key points to consider when slicing your model:
- Slicing Techniques:
- Choose the appropriate slicing technique based on the complexity of your model and the desired level of detail.
- Experiment with different slicing techniques to optimize the printing speed and quality.
- Optimizing Settings:
- Adjust the slicing settings to optimize the print quality, such as layer height, infill density, and print speed.
- Fine-tune the temperature settings to ensure proper filament extrusion and adhesion.
- Troubleshooting Tips:
- If you encounter issues like stringing or warping, adjust the retraction and cooling settings in the slicing software.
- Check for any gaps or overlapping in the sliced layers and adjust the model or slicing settings accordingly.
- Filament Selection:
- Consider the characteristics of different filaments, such as PLA, ABS, or PETG, to choose the most suitable one for your project.
- Experiment with different filament brands and colors to achieve the desired aesthetic.
- Finishing Techniques:
- Explore post-processing techniques like sanding, painting, or applying a clear coat to enhance the appearance of your printed model.
- Use support structures when necessary and learn how to remove them effectively without damaging the print.
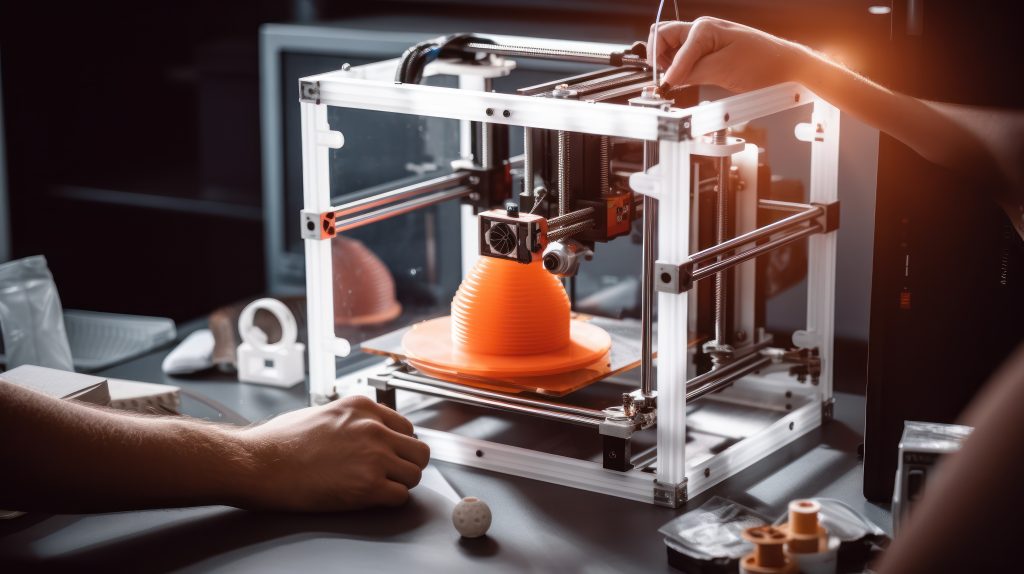
Step 3: Preparing the Printer
After slicing your model using slicing software like ideaMaker, it’s time to prepare your 3D printer for printing by following these steps. First, ensure that the printer is in a clean and well-maintained condition. Regularly clean the printer bed, extruder nozzle, and other components to prevent any debris or residue from affecting the print quality. Next, optimize the print settings according to the desired outcome. Adjust parameters such as layer height, print speed, and infill density to achieve the desired level of detail and strength. It is also important to troubleshoot common issues that may arise during the printing process. If you encounter filament jams, check for any clogs or obstructions in the extruder and clear them if necessary. Additionally, if you notice any print quality issues such as stringing, warping, or uneven layers, adjust the temperature and cooling settings to improve the print quality. By maintaining the printer, troubleshooting common issues, and optimizing print settings, you can ensure a successful 3D printing process.
Step 4: Printing the Model
Now that your 3D printer is prepared and optimized, it’s time to begin the printing process. Here are the key steps and considerations to ensure a successful print:
- Optimizing Print Settings:
- Adjust the printing speed to balance between quality and time. Higher speeds may result in lower quality prints.
- Experiment with different layer heights to find the optimal balance between speed and detail.
- Fine-tune the temperature settings for the filament being used to prevent issues like under-extrusion or stringing.
- Use support structures when necessary to improve the print’s stability and accuracy.
- Troubleshooting Common Issues:
- If your prints are not sticking to the bed, try leveling the bed again or using adhesion techniques like a brim or raft.
- If you’re experiencing warping or curling of prints, consider using a heated bed and/or enclosing the printer to maintain a consistent temperature.
- Clogged or inconsistent extrusion can be resolved by cleaning or replacing the nozzle and ensuring proper filament feeding.
- Different Post Processing Techniques:
- Sanding the surface with sandpaper or sponge can smooth out imperfections.
- Surface treatment with solvents like acetone can give a polished finish to certain materials.
- Combining mechanical and chemical methods can provide the best results for post-processing.
- 3D Printing in Education:
- 3D printing offers valuable hands-on learning experiences for students in various subjects, such as engineering, design, and biology.
- It allows for the creation of visual aids, prototypes, and models to enhance understanding and engagement.
- Students can learn about the entire 3D printing process, from designing to troubleshooting, fostering critical thinking and problem-solving skills.
Step 5: Post-Processing the 3D Printed Object
How can you enhance the appearance and quality of your 3D printed object through post-processing? Post-processing is an essential step in achieving the desired finish and refinement of your 3D printed object. There are various techniques and options available for post-printing enhancements, including sanding techniques, chemical treatments, and surface refinements. These methods can help smooth out rough surfaces, remove visible layer lines, and improve the overall aesthetic appeal of your 3D printed object.
To give you a better understanding of the different post-processing techniques and options available, here is a table outlining some common methods:
| Post-Processing Technique | Description | Benefits |
|---|---|---|
| Sanding Techniques | Using sandpaper or sponge to smooth the surface | Removes layer lines and improves surface finish |
| Chemical Treatments | Surface treatment with solvents like acetone | Provides a smooth and polished appearance |
| Post Printing Enhancements | Applying paint, coatings, or decorative finishes | Enhances the appearance and adds a personal touch |
| Finishing Options | Buffing, polishing, or adding texture | Adds a professional and refined look |
| Surface Refinements | Filling gaps, repairing imperfections | Creates a smoother and more flawless surface |
Exploring Applications of 3D Printing in High-End Industries
To fully understand the potential impact of 3D printing, it is important to explore the widespread applications of this technology in high-end industries.
- 3D printing in the medical field:
- Customized prosthetics and implants can be created for patients, improving functionality and comfort.
- Medical models can be 3D printed to aid in surgical planning and education.
- Bioprinting is being researched to develop printable organs and tissues for transplantation.
- 3D printing in the automotive industry:
- Rapid prototyping allows for faster design iterations and product development.
- Spare parts can be 3D printed on-demand, reducing inventory costs and lead times.
- Lightweight and complex components can be produced, improving fuel efficiency and performance.
- 3D printing in architecture:
- Intricate models and prototypes can be created, aiding in design visualization and client presentations.
- Customized and unique architectural elements can be produced with ease.
- 3D printing enables the exploration of sustainable construction materials and methods.
- 3D printing in fashion:
- Customizable and personalized products can be created, catering to individual preferences.
- Complex and intricate designs can be realized, pushing the boundaries of fashion.
- The technology allows for on-demand manufacturing, reducing waste and inventory costs.
- 3D printing in supply chains:
- Spare parts and equipment can be 3D printed on-site, eliminating the need for extensive inventory.
- Customized tools and equipment can be rapidly produced, improving operational efficiency.
- 3D printing enables the creation of complex geometries and optimized designs, enhancing product performance.
Materials Used in 3D Printing
Now let’s delve into the materials used in 3D printing. PLA (Polylactic Acid) is a popular choice, known for being biodegradable and easy to use. ABS (Acrylonitrile Butadiene Styrene) is a strong and durable filament commonly used in industrial applications. Flexible filaments like TPU (Thermoplastic Polyurethane) are ideal for creating flexible and elastic objects. Additionally, nylon filaments are known for their strength, flexibility, and resistance to impact.
PLA
You can use PLA, a biodegradable and easy-to-use filament, as one of the materials in your 3D printing projects. PLA offers several benefits, including its eco-friendliness and ease of use. Here are some key points about PLA:
- Benefits of PLA:
- PLA is biodegradable and environmentally friendly.
- It has a low melting point, making it easy to print with.
- PLA produces less warping and has minimal odor compared to other filaments.
- It is available in a wide range of colors and finishes.
- PLA vs ABS:
- PLA is more brittle but offers better detail and resolution.
- ABS is stronger and more flexible but can produce unpleasant fumes during printing.
- PLA filament properties:
- PLA is made from renewable resources like cornstarch or sugarcane.
- It has good dimensional accuracy and stability.
- PLA is less prone to shrinking and warping.
- PLA printing tips:
- Use a heated bed or apply glue stick for better adhesion.
- Print PLA at a temperature range of 190-220°C.
- Use a cooling fan to improve print quality.
- PLA vs other filaments:
- PLA is easier to print with compared to more advanced filaments like PETG or nylon.
- PLA is not suitable for high-temperature applications or mechanical stress.
ABS
When choosing materials for your 3D printing projects, consider using ABS filament, a strong and flexible option. ABS, or Acrylonitrile Butadiene Styrene, is a popular choice for 3D printing due to its durability and versatility. Understanding ABS filaments is essential for achieving successful prints. Troubleshooting common ABS printing issues, such as warping and cracking, can help improve print quality. It is also beneficial to compare ABS with other 3D printing materials to determine the best choice for your specific project. Optimizing ABS printing settings, such as adjusting the nozzle temperature and build plate adhesion, can further enhance the printing process. Additionally, post-processing techniques for ABS prints, such as sanding and acetone smoothing, can improve the surface finish and overall appearance of the printed object.
Filexible
Filexible is a commonly used material in 3D printing, offering a high degree of flexibility and versatility for various applications.
- Filexible is one of the many 3D printing materials available in the market.
- It provides several benefits, including the ability to create customized objects.
- Filexible is particularly useful in healthcare applications, where personalized medical devices and prosthetics can be produced.
- It is also ideal for automotive prototyping, allowing for the rapid production of complex and lightweight parts.
- Additionally, Filexible contributes to sustainable 3D printing practices as it is biodegradable and eco-friendly.
With Filexible, you can harness the power of 3D printing materials to create customized and functional objects in healthcare, automotive, and other industries. Its flexibility and versatility make it an excellent choice for a wide range of applications.
Nylon
Nylon is a versatile material commonly used in 3D printing for its strength, flexibility, and resistance to impact. Its unique properties make it suitable for a wide range of applications. Nylon has several advantages in 3D printing, including its ability to create durable and functional parts. It is compatible with most FFF (Fused Filament Fabrication) printers and can be easily printed with standard settings. However, there are some limitations to consider. Nylon has a tendency to warp during printing, so proper bed adhesion and temperature control are crucial. It also requires a higher printing temperature compared to other filaments. Troubleshooting tips for nylon printing include adjusting bed leveling, using a brim or raft for better adhesion, and experimenting with different print speeds. Overall, nylon is a reliable and popular material for 3D printing due to its strength and flexibility.
Advancements and Future Possibilities of 3D Printing
What are the potential advancements and future possibilities of 3D printing for you to explore? As 3D printing technology continues to evolve, there are exciting opportunities in various industries. Here are some advancements and future possibilities of 3D printing:
- 3D Printing in Architecture:
- Architects can create intricate models and prototypes, allowing for better visualization and design development.
- Customized building components can be printed, reducing construction time and costs.
- Construction processes can be optimized, leading to sustainable and efficient building practices.
- 3D Printing in Fashion:
- Designers can create unique and customizable products, pushing the boundaries of traditional fashion.
- On-demand production of clothing and accessories can reduce waste and inventory costs.
- Personalized and tailored garments can be easily produced, enhancing the customer experience.
- 3D Printing in Healthcare:
- Customized prosthetics and implants can be created, improving patient outcomes.
- Research is being conducted to develop printable organs and tissues for medical purposes.
- Personalized medication and drug delivery systems can be designed, enhancing treatment effectiveness.
- 3D Printing in Automotive:
- Rapid prototyping allows for faster design iteration and testing of vehicle components.
- Spare parts can be manufactured on-demand, reducing inventory and supply chain issues.
- Lightweight and complex components can be produced, improving fuel efficiency and performance.
- 3D Printing in Construction:
- Entire houses and buildings can be 3D printed, revolutionizing the construction industry.
- Sustainable and recyclable materials can be utilized, promoting environmentally friendly practices.
- On-site printing can reduce labor costs and construction time, making projects more efficient.
These advancements and future possibilities demonstrate the transformative potential of 3D printing in various industries, offering new opportunities for innovation, customization, and sustainability.