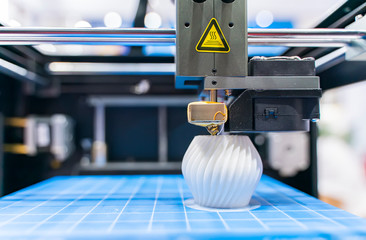
From sanding techniques to epoxy coating, I will introduce you to workable techniques for smoothing rough edges of 3D printed objects.
So, get ready to take your 3D printing game to the next level!
Sanding Techniques for Smoothing Rough Edges
Sanding is a commonly used technique for smoothing rough edges on 3D printed objects. When it comes to sanding PLA prints, there are a few techniques that can help you achieve a smooth finish.
One of the most popular methods is using sandpaper for post-processing 3D prints. By gently sanding the surface of the print, you can remove layer lines and imperfections, resulting in a smoother appearance.
To achieve the best results, it’s important to follow a few sanding tips for improving the surface quality of your 3D printed objects.
- First, start with a fine-grit sandpaper and gradually work your way up to finer grits. This will help to gradually smooth out the surface without causing too much damage.
- Additionally, using a wet sanding technique can further enhance the smoothness of the print.
- When sanding PLA prints, it’s important to be patient and take your time. Rushing the process can lead to uneven surfaces or even damage the print.
- It’s also important to be mindful of your sanding technique. Using light, circular motions can help to evenly distribute the sanding pressure and prevent over-sanding in certain areas.
Acetone Vapor Bath for Smoothing 3D Printed Objects
Using an acetone vapor bath can dissolve the outer layer of PLA prints, resulting in a smoother surface.
This method of smoothing 3D prints offers several benefits:
- Acetone vapor bath can significantly reduce or eliminate visible layer lines, resulting in a smoother finish.
- Smoothed prints are more visually appealing and have a professional finish.
- Smoothing PLA prints can be particularly beneficial for functional prints that require a smooth surface.
Nonetheless, it is important to take safety precautions when using an acetone vapor bath:
- Acetone vapor can be hazardous if inhaled, so it is crucial to work in a well-ventilated space or use a fume hood.
- It is recommended to wear gloves and safety goggles to protect your skin and eyes from contact with acetone.
- Acetone is highly flammable, so it is important to keep it away from any open flames or sparks.
There are alternative methods for smoothing 3D prints if you prefer not to use acetone:
- Sanding the surface of PLA prints can help to remove layer lines and create a smoother finish.
- Applying an epoxy coating to PLA prints can fill in the layer lines and create a smooth, glossy finish.
Common mistakes to avoid when using an acetone vapor bath:
- Acetone can dissolve PLA prints, so it is important to monitor the print and remove it from the bath once the desired level of smoothing is achieved.
- The acetone vapor bath should be sealed tightly to prevent the vapors from escaping and to ensure effective smoothing.
Epoxy Coating as a Smoothing Method for 3D Prints
One effective way to achieve a smoother finish on 3D prints is by applying an epoxy coating. Epoxy coating not only improves the surface appearance of the prints but also enhances their durability.
Compared to other smoothing methods such as sanding or acetone vapor baths, epoxy coating offers a more efficient and reliable solution. The epoxy forms a protective layer over the print, filling in the layer lines and creating a smooth, glossy finish.
This coating not only hides imperfections but also adds strength and durability to the print, making it more resistant to wear and tear.
In terms of post-processing time, applying an epoxy coating is relatively quick and easy.
- Once the print is clean and dry, you can simply mix the epoxy according to the manufacturer’s instructions and apply it evenly using a brush or spray.
- The epoxy then cures and hardens, resulting in a smooth and durable finish.
However, it is important to take safety precautions when working with epoxy.
- Make sure to work in a well-ventilated area and wear protective gloves and goggles to avoid any contact with the epoxy.
- It is also advisable to read and follow the instructions provided by the epoxy manufacturer to ensure proper application and curing.
While there are alternative smoothing methods available, such as sanding or filler primers, epoxy coating offers a more efficient and durable solution. Its ability to fill in layer lines and provide a glossy finish makes it a popular choice among 3D printing enthusiasts.
Filler Primer for Filling in Rough Edges on 3D Prints
To achieve a smoother surface on your 3D prints, you can try applying a filler primer to fill in any rough areas. Filler primers are commonly used in automotive and DIY projects to create a smooth and even surface before painting.
Here are some key points to consider when using filler primer for your 3D prints:
Filler Primer Application
- Start by cleaning your 3D print to remove any dust or debris.
- Shake the filler primer can well to ensure proper mixing of the product.
- Hold the can about 6-8 inches away from the print and spray a light, even coat.
- Allow the filler primer to dry completely before applying additional coats or moving on to other post-processing techniques.
Alternative Smoothing Methods:
- If you prefer a more hands-on approach, you can use sandpaper to smooth out rough edges and layer lines.
- This method involves exposing your print to acetone vapor, which can help to melt and smooth the surface.
Troubleshooting Rough Edges
- If you notice any rough edges or imperfections after applying the filler primer, you can use sandpaper or a file to gently sand them down.
- Be sure to work slowly and check your progress frequently to avoid removing too much material.
Heat Gun Smoothing Techniques for 3D Printed Objects
You can achieve a smoother surface on your 3D prints by applying heat from a gun, which will soften the material and allow for manual smoothing using tools.
Using a heat gun for smoothing your 3D prints offers an alternative method to traditional sanding techniques. It can be particularly useful for prints with intricate details or hard-to-reach areas.
- When using a heat gun for smoothing, it is important to prioritize safety. Always work in a well-ventilated area to avoid inhaling fumes.
- Wear protective gear such as gloves and safety glasses to protect yourself from burns.
- Additionally, be mindful of the temperature settings on your heat gun. PLA, for example, typically requires a temperature between 60-80°C (140-176°F) to soften without causing deformation.
To achieve the best results;
- It is essential to maintain a consistent distance between the heat gun and the print.
- A distance of around 5-10 cm (2-4 inches) is recommended.
- Move the heat gun in a slow and sweeping motion across the surface of the print, ensuring even heating.
- As the material softens, use tools like spatulas or sanding blocks to gently smooth out imperfections and layer lines.
While a heat gun can be an effective method for smoothing 3D prints, it is important to note that it may not be suitable for all prints or materials. Some prints may require a combination of sanding and heat gun smoothing for optimal results.
Experimentation and patience are key to finding the best technique for your specific print.
Tips for Successfully Smoothing Rough Edges on 3D Prints
Achieving a smooth surface on 3D prints can be accomplished by employing various methods that effectively minimize the appearance of imperfections. To successfully smooth rough edges on your 3D prints, consider the following tips:
Polishing Techniques
Wet Sanding
Use fine-grit sandpaper and water to gently sand the surface of the print in a circular motion. This helps to remove layer lines and create a smoother finish.
Polishing Compound
Apply a small amount of polishing compound to a soft cloth and buff the surface of the print. This can help to further smooth out any remaining imperfections.
Surface Finishing Options
Resin Coating
Apply a thin layer of clear resin to the surface of the print. This can help to fill in any gaps or layer lines, resulting in a smoother finish.
UV Curing
Use a UV light source to cure a UV-sensitive resin coating on the print. This can help to create a hard, smooth surface.
Post-Processing Recommendations
- Before applying any smoothing techniques, make sure to clean the print thoroughly to remove any dust or debris. This will ensure better adhesion of smoothing materials.
- Always test the smoothing method on a small, inconspicuous area of the print before applying it to the entire surface. This allows you to assess the effectiveness and potential impact on the print.
Troubleshooting Common Issues
- If you notice an uneven surface after smoothing, try sanding the area again with a finer grit sandpaper to achieve a more consistent finish.
- Be cautious not to over-smooth the print, as this can result in the loss of fine details or distortion of the print.
Alternative Smoothing Methods
Chemical Smoothing
Some chemicals, such as tetrahydrofuran (THF), can be used to dissolve the outer layer of the print, resulting in a smoother surface. However, caution must be exercised when working with these chemicals, as they can be hazardous.
Considerations for Smoothing PLA Prints
Smoothing PLA prints requires careful consideration of various factors. Post-processing is an important step in achieving smooth results. It not only improves the surface finish of 3D prints but also reduces or eliminates visible layer lines, enhancing the overall aesthetic appeal.
However, safety considerations must be taken into account when engaging in PLA smoothing. Some methods, such as acetone vapor baths, can be hazardous, so it is crucial to work in a well-ventilated area and wear appropriate protective gear.
Experimenting with different smoothing methods is key to finding the most effective technique for your specific needs. Sanding the surface, using an acetone vapor bath, applying an epoxy coating, using filler primer, or applying heat with a heat gun are all viable options.
Still, it is essential to start with well-printed models, clean the print thoroughly, and test the smoothing method on a small area before applying it to the entire surface.
Time allocation for post-processing should be considered as well. Smoothing PLA prints can be a time-consuming process, especially for large or complex prints. Planning accordingly and allowing enough time for post-processing is crucial.
Advanced 3D Printing Technology for Smoothing Rough Edges
Now that you have learned about the considerations for smoothing PLA prints, let’s explore the world of advanced 3D printing techniques for smoothing rough edges. These innovative surface finishing methods utilize cutting-edge smoothing methods and high-tech post-processing techniques to revolutionize edge smoothing solutions.
To achieve a professional and polished finish on your 3D printed objects, consider the following advanced techniques:
Resin Bath
This method involves immersing the printed object in a resin bath, which fills in the layer lines and creates a smooth surface. The resin hardens and forms a protective coating, resulting in a flawless finish.
Laser Smoothing
Using a laser, this technique selectively melts the surface of the printed object, smoothing out any imperfections and creating a uniform appearance. Laser smoothing is precise and can be used on intricate designs.
These advanced 3D printing techniques offer a level of precision and quality that goes beyond traditional methods of smoothing. By utilizing these cutting-edge methods, you can achieve a smooth and professional finish on your 3D printed objects, enhancing their overall appearance and functionality.


