Are you interested in learning the basics of 3D printing? In this article, we will guide you through 13 steps that will help you get started on your 3D printing journey.
You’ll discover how to:
– Choose the right printer
– Explore different printing processes
– Select suitable materials
– Design 3D models using CAD software
We’ll also cover:
– Post-processing techniques
– Troubleshooting common issues
– Provide advanced tips and tricks
Get ready to expand your skills and knowledge in the exciting world of 3D printing!
Step 1: Understanding the Basics of 3D Printing
To get started with 3D printing, you need to understand the basics, such as how a 3D printer creates objects layer by layer. Understanding the technology is crucial to ensure successful prints.
One important aspect is choosing the right filament. Filament is the material used by the printer to build the object. There are different types of filaments available, such as PLA and PET-G. PLA is beginner-friendly and cost-effective, while PET-G is suitable for industries like engineering.
Safety precautions are also essential when working with 3D printers. It is important to follow manufacturer instructions, wear protective gear like gloves and goggles, and ensure proper ventilation in the printing area.
Step 2: Choosing the Right 3D Printer
When choosing the right 3D printer for you, consider factors like your budget, desired print quality, and the materials you plan to use.
Budget considerations play a major role in determining which printer is suitable for you. There are various printer specifications to keep in mind, such as the build volume, resolution, and print speed. It’s important to choose a printer that meets your specific needs.
Additionally, user-friendly options are essential, especially for beginners. Look for printers with intuitive interfaces and easy-to-use software. Some printers even come with pre-calibrated settings to simplify the printing process.
Step 3: Exploring Different 3D Printing Processes
Considerations for choosing the right 3D printer include budget, desired print quality, and the materials you plan to use.
When exploring different 3D printing processes, it’s important to compare FDM and SLA printing, understand the benefits of SLS printing, and be aware of the limitations of LOM printing.
FDM printing, also known as fused deposition modeling, uses melted plastic to create objects layer by layer. It is affordable and versatile, making it suitable for beginners.
SLA printing, or stereolithography, uses a laser to solidify liquid resin, resulting in high-quality prints with intricate details.
SLS printing, or selective laser sintering, cures powdered material with a laser, allowing for a wide range of materials and complex parts.
LOM printing, or laminated object manufacturing, involves cutting slices of the 3D model and gluing them together, making it best for large parts but with limitations in precision.
Consider your specific needs and requirements when choosing the right 3D printing process for your project.
Step 4: Selecting the Suitable Materials for 3D Printing
Now, let’s discuss how you can select the suitable materials for 3D printing.
When choosing materials for 3D printing, there are several factors to consider.
First, consider the properties you want in your final object, such as strength, flexibility, or heat resistance. Different materials have different properties, so choose accordingly.
Popular materials for 3D printing include PLA, ABS, PETG, and nylon. PLA is easy to print with and biodegradable, while ABS is known for its strength and durability. PETG is beginner-friendly and suitable for engineering applications.
Additionally, advancements in 3D printing materials are constantly being made, with new materials being developed that offer improved properties and performance. It’s important to stay updated on these advancements to take advantage of the latest materials for your 3D printing projects.
Step 5: Designing 3D Models With CAD Software
To design 3D models with CAD software, you’ll need to familiarize yourself with the different tools and features available. CAD software features include the ability to create complex shapes, manipulate objects, and apply various textures and materials to your designs. Additionally, CAD software allows you to perform precise measurements and calculations, ensuring accuracy in your 3D models.
When it comes to designing software comparison, there are several options to choose from, such as Tinkercad, SolidWorks, and Autodesk Fusion 360. Each software has its own unique set of features and capabilities.
To master 3D modeling techniques, you’ll need to practice using the different tools and experimenting with different design approaches. With time and practice, you’ll become more proficient in creating detailed and realistic 3D models using CAD software.
Step 6: Preparing the 3D Model for Printing
Once you have finished designing your 3D model using CAD software, the next step is to prepare it for printing.
This involves optimizing print settings, preparing support structures, and choosing the right infill pattern.
Optimizing print settings involves adjusting parameters such as layer height, print speed, and temperature to ensure the best quality and accuracy of your print.
Preparing support structures is important for complex or overhanging parts of your model that may need additional support during the printing process. These structures can be easily removed once the print is complete.
Lastly, choosing the right infill pattern determines the internal structure of your model, affecting its strength and material usage. Common infill patterns include honeycomb, grid, and triangles.
Step 7: Setting Up the 3D Printer
Before starting the 3D printing process, make sure you have properly set up your printer. Calibrate the build plate, load the filament, and ensure the printer is connected to the computer or the file is stored on an SD card. Setting up the printer correctly is crucial for optimal performance.
Start by calibrating the build plate to ensure that the first layer adheres properly. This will prevent issues such as warping or poor bed adhesion.
Next, load the filament into the printer according to the manufacturer’s instructions. Make sure the filament is feeding smoothly and evenly to avoid any clogs or extrusion problems.
Finally, check that your printer is connected to the computer or that the file is stored on an SD card. Troubleshoot any connection issues before proceeding with the printing process.
Taking the time to set up your printer correctly will help ensure successful prints and minimize frustration.
Step 8: Adjusting Printing Parameters for Desired Results
Make sure you adjust the printing parameters on your 3D printer to achieve the desired results for your object. Optimizing print settings and fine-tuning print parameters are crucial steps in achieving the desired print quality.
By adjusting parameters such as layer height, print speed, and temperature, you can optimize the printing process for your specific object and material. For example, reducing the layer height can result in smoother and more detailed prints, while adjusting the print speed can help prevent issues like stringing or warping. Additionally, controlling the temperature can ensure proper material flow and adhesion.
Experimenting with different settings and making small adjustments can make a big difference in the final quality of your 3D prints.
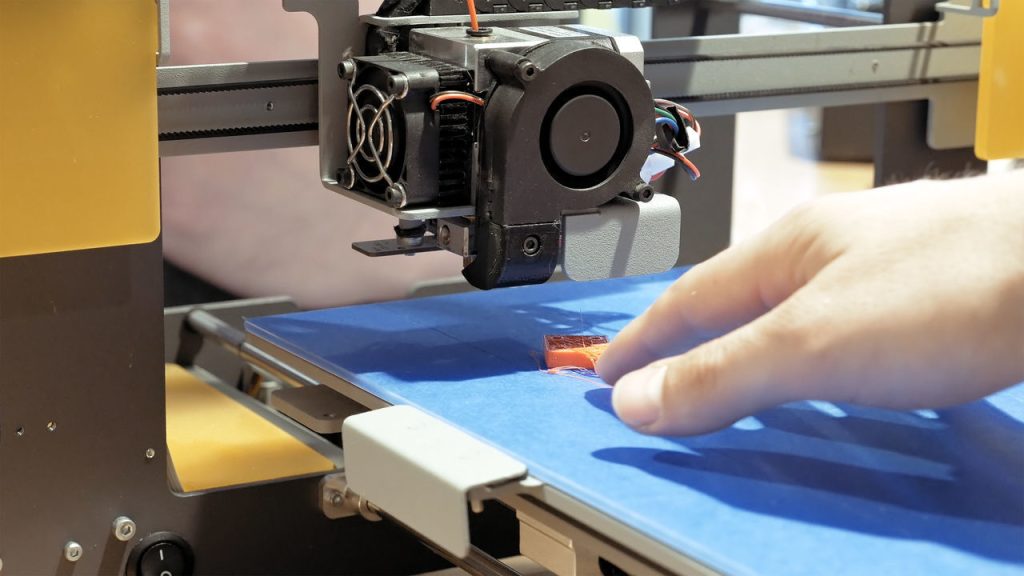
Step 9: Printing the First Prototype
Now that you have adjusted the printing parameters, it’s time to move on to the next step: printing the first prototype. This is an exciting moment because you will finally see your design come to life.
Printing the first prototype using a 3D printer offers numerous benefits, especially when it comes to rapid prototyping. You can quickly iterate on your design, making adjustments and improvements as you go. This saves time and money compared to traditional manufacturing methods.
However, there are common mistakes to avoid in 3D printing to ensure high-quality prints. One important tip is to properly calibrate your printer before starting the print. This includes leveling the bed, checking filament tension, and ensuring the nozzle is clean.
Additionally, paying attention to the layer height and print speed can greatly impact the quality of your prints. Experimenting with these settings can help you achieve the desired level of detail and accuracy.
Step 10: Post-Processing and Finishing Techniques
After printing the first prototype, it is important to focus on post-processing and finishing techniques to enhance the final appearance and functionality of the 3D printed object.
Post-processing techniques involve various methods to improve the surface finish and overall quality of the print. One common technique is smoothing, which involves using sandpaper or abrasive materials to remove layer lines and imperfections.
Additionally, surface finishing techniques such as painting, polishing, or applying a protective coating can give the object a professional and polished look.
These techniques not only improve the aesthetics of the print but can also enhance its functionality by ensuring smooth and precise movements of moving parts.
Step 11: Troubleshooting Common 3D Printing Issues
To troubleshoot common issues with your 3D prints, you can start by checking the filament feed and ensuring it is properly loaded and extruding smoothly.
Common 3D printing issues can include filament jams, under-extrusion, and poor adhesion to the print bed.
If you’re experiencing a filament jam, try unclogging the nozzle by heating it up and manually removing any obstructions.
Under-extrusion can be caused by a partial clog or incorrect temperature settings, so make sure the filament is flowing properly and adjust the temperature if needed.
Poor adhesion to the print bed can be improved by cleaning the bed surface and using adhesive aids like glue or tape.
Troubleshooting techniques like these can help you identify and resolve common 3D printing issues, ensuring successful and high-quality prints.
Step 12: Advanced Tips and Tricks for 3D Printing
For advanced users, it’s important to fine-tune print settings such as layer height, infill density, and print speed to achieve optimal results.
By utilizing advanced slicing techniques and optimizing print settings, you can take your 3D printing to the next level.
Adjusting the layer height can have a significant impact on the overall quality and detail of your prints.
Experimenting with different infill densities can help balance strength and material usage.
Additionally, adjusting the print speed can affect print quality and completion time.
When troubleshooting complex prints, consider adjusting these settings to address specific issues such as stringing, warping, or poor adhesion.
With advanced knowledge of print settings and slicing techniques, you can unlock the full potential of your 3D printer and achieve exceptional results.
Step 13: Expanding Your 3D Printing Skills and Knowledge
As you continue to explore the world of 3D printing, expanding your skills and knowledge will allow you to tackle more complex projects and push the boundaries of what you can create. By exploring advanced techniques, materials, and applications, you can unlock new possibilities in 3D printing.
There are constant innovations in 3D printing, with emerging technologies and future possibilities that can revolutionize the field. From new materials with unique properties to improved printing processes, staying up-to-date with the latest advancements can greatly enhance your abilities.
Of course, 3D printing also comes with its challenges, but by developing problem-solving and optimization strategies, you can overcome these obstacles and achieve better results. So, don’t be afraid to dive deeper into the world of 3D printing and expand your skills and knowledge to unlock endless creative opportunities.

