Are you ready to unleash your creativity and bring your 3D models to life? Look no further than Blender, the powerful and versatile software that has been supporting 3D printing since 2002. In this article, you’ll discover the benefits of using Blender for 3D printing and learn how to maximize its potential. From analyzing and preparing your models to fixing non-manifold issues, Blender’s 3D Printing Toolbox has got you covered. Get ready to dive into the world of 3D printing with Blender and create stunning models for 3D printing.
Getting Started With Blender
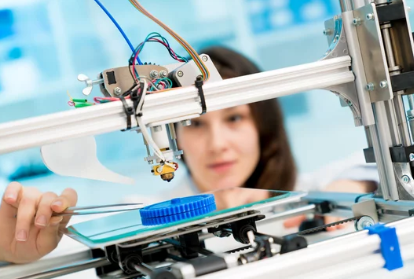
To begin creating 3D models for 3D printing with Blender, start by familiarizing yourself with the software’s interface and tools. Blender offers a wide array of modeling techniques that can be used to create complex geometries for 3D printing. Whether you are a beginner or an experienced user, Blender provides the necessary tools to achieve high-quality prints.
One important aspect of 3D printing is troubleshooting common printing issues. Blender’s 3D Printing Toolbox can assist in identifying and resolving issues such as wall thickness and overhang problems. By utilizing this toolbox, you can ensure that your models are suitable for 3D printing and avoid potential printing errors.
Furthermore, Blender allows you to enhance the print quality of your models through post-processing techniques. These techniques involve refining the surface finish and improving the overall appearance of your prints. Additionally, Blender enables you to incorporate textures and colors into your 3D printed models, adding a unique and personalized touch to your creations.
Understanding the Basics of 3D Printing
You can gain a solid understanding of the basics of 3D printing by familiarizing yourself with the technology and its applications. Troubleshooting common 3D printing issues is an important skill to have when working with 3D printers. Some common issues include poor adhesion to the print bed, stringing between printed parts, and warping of the printed object. Advanced modeling techniques in Blender can help you create complex and detailed 3D models that are suitable for 3D printing.
Blender offers a wide range of tools and features that allow for precise modeling and customization. Integrating Blender with other 3D printing software, such as slicers and mesh repair tools, can further enhance your workflow and optimize the printing process. Post-processing techniques for 3D printed models, such as sanding, painting, and polishing, can improve the overall appearance and functionality of the printed objects. Finally, exploring innovative applications of 3D printing, such as in the fields of medicine, architecture, and fashion, can inspire new ideas and push the boundaries of what is possible with this technology.
Choosing the Right 3D Printing Materials
When selecting 3D printing materials, it’s important to consider their properties and suitability for your project. Understanding material properties is crucial in order to achieve the desired results. The most commonly used materials for 3D printing are PLA (polylactic acid) and ABS (acrylonitrile butadiene styrene). PLA is known for its ease of use, biodegradability, and low toxicity, making it a popular choice for beginners. ABS, on the other hand, offers greater strength and durability, but it requires higher printing temperatures and adequate ventilation due to its release of potentially harmful fumes.
However, it is worth exploring alternative materials to suit specific project requirements. For example, there are filaments available that mimic the appearance and texture of wood, metal, or even flexible rubber. These advancements in 3D printing materials have expanded the possibilities for creating unique and functional objects.
When comparing PLA and ABS, it is important to consider factors such as strength, flexibility, temperature resistance, and post-processing requirements. PLA is generally more brittle and has a lower melting point, while ABS offers better impact resistance and can withstand higher temperatures.
The Benefits and Limitations of Blender for 3D Printing
Blender’s versatility makes it an invaluable tool for 3D printing enthusiasts and professionals alike. One of the key benefits of using Blender for 3D printing is its extensive support for 3D printing modeling and file formats, which has been available since 2002. Blender is accessible to both beginners and professionals, offering extensive training materials and resources for learning Blender modeling.
Additionally, Blender’s 3D Printing Toolbox, introduced in version 2.67, enhances accessibility and power for 3D printing in Blender. This toolbox provides real-time mesh analysis tools that help identify and resolve issues such as wall thickness and overhang problems. It assists in creating efficient and high-quality 3D prints.
However, it is important to note the limitations of Blender for 3D printing. While Blender supports a wide range of file formats, it may not be compatible with all 3D printers and services. Troubleshooting printing issues can be challenging, as Blender does not offer direct control over printer settings. It is recommended to optimize print settings within the chosen slicing software. Post-processing techniques, such as sanding or painting, may also be necessary to achieve desired results. Despite these limitations, Blender’s benefits and its continuous evolution in improving its features for 3D printing make it a valuable tool for creating intricate and high-quality 3D prints.
Exploring Blender’s 3D Printing Toolbox
As you delve into the world of 3D printing with Blender, it is important to explore the functionality and capabilities of Blender’s 3D Printing Toolbox. This toolbox provides you with a range of tools and features that are specifically designed for 3D printing. One of the key features is the mesh analysis tools, which allow you to analyze your 3D model in real-time and identify any potential issues that may arise during the printing process. These tools can help you troubleshoot common printing issues such as wall thickness problems and overhangs. Additionally, the toolbox also offers advanced modeling techniques that are optimized for 3D printing. This includes features like creating supports and adding infill to your model. Furthermore, the toolbox allows you to customize print settings directly within Blender, giving you more control over the printing process.
However, if you prefer to explore alternative 3D printing software, Blender is compatible with various 3D printing services and printers, providing you with flexibility and options. Overall, Blender’s 3D Printing Toolbox is a valuable resource for 3D printing enthusiasts, offering a comprehensive set of tools and features to ensure successful and high-quality prints.
Preparing Your 3D Model for Printing
To prepare your 3D model for printing, you need to ensure that it is optimized for a successful printing process. Model optimization is crucial to avoid printing troubleshooting and to achieve high-quality prints. In Blender, you can employ advanced modeling techniques to refine your model and make it suitable for 3D printing.
Start by checking the manifolding of your model. A manifold model is a solid, enclosed object with no missing vertices or holes. To verify if your model is manifold, use Blender’s 3D Printing Toolbox. Look for a Non-Manifold Edge count of 0 in the results. If the count is above 0, you will need to fix the issue.
There are two methods to fix a non-manifold model. The first method is to utilize Blender’s built-in cleanup tool located in the Clean Up section. Select the model and choose the Make Manifold option. This method may alter the model, but it is a simple way to fix non-manifold issues.
The second method is to use an external app called 3D Builder by Microsoft. Download and install 3D Builder on Windows 8 or 10, then import your model into the program. Follow the instructions provided by 3D Builder to fix any errors and make the model manifold. Note that the model’s shape may be modified for better printability.
Once your model is manifold, export it from Blender as an STL file. STL files describe the surface geometry of a 3D object. Import the STL file into a slicing software like Cura, where you can adjust parameters such as print speed and support structure. This step ensures that your model is ready for printing with multiple materials if desired.
Remember that post-processing techniques may be necessary after printing to achieve the desired finish.
Ensuring Your Model Is Manifold
To ensure your model is manifold, you need to address any non-manifold issues that may be present. Non-manifold models can cause printing problems and result in failed or flawed prints. Here are some key steps to troubleshoot non-manifold models:
– **Check for Non-Manifold Edges**: Use Blender’s 3D Printing Toolbox to analyze your model and look for a Non-Manifold Edge count of 0. If the count is above 0, there are non-manifold issues that need to be fixed.
– **Fixing Non-Manifold Issues**: There are two methods you can use to fix non-manifold models:
– **Method 1**: Utilize Blender’s built-in cleanup tool in the Clean Up section. Select the model and choose the Make Manifold option. This method may alter the model, but it is a simple way to fix non-manifold issues.
– **Method 2**: Use an external app called 3D Builder by Microsoft. Download and install 3D Builder on Windows 8 or 10. Import your model into 3D Builder and follow the program’s instructions to fix any errors and make the model manifold. Note that the model’s shape may be modified for better printability.
Once your model is manifold, you can move on to other important considerations for successful 3D printing, such as:
– **Best Practices for Model Scaling**: Ensure that your model is scaled appropriately for your desired print size. Pay attention to details and avoid scaling down too much, as it can result in loss of detail and thin features that may not print properly.
– **Design Considerations for Supports**: If your model has overhangs or intricate features, consider adding supports to ensure successful printing. This will prevent sagging or collapsing during the printing process.
– **Optimizing Infill Density**: Adjust the infill density in your model to balance print strength and material usage. Higher infill percentages result in stronger prints but may require more material and longer print times.
– **Advanced Slicer Settings**: Explore the advanced settings in your slicer software, such as print speed, layer height, and cooling options. These settings can significantly impact the quality and success of your prints.
Fixing Non-Manifold Models in Blender
To fix non-manifold models in Blender, you can utilize Blender’s built-in cleanup tool or use an external app called 3D Builder by Microsoft. Non-manifold models often have issues such as missing faces, overlapping geometry, or non-connected edges. These issues can cause problems when trying to 3D print the model, as it may result in gaps, holes, or other defects in the final printed object.
Blender’s built-in cleanup tool, located in the Clean Up section, offers a simple method for fixing non-manifold issues. By selecting the model and choosing the Make Manifold option, Blender will attempt to automatically resolve non-manifold problems. However, be aware that this method may alter the model, so it’s essential to check the changes and ensure they are acceptable.
If you prefer an external app, you can use 3D Builder by Microsoft. This app is available for Windows 8 or 10 and provides instructions to fix non-manifold errors and make the model manifold. Keep in mind that the shape of the model may be modified for better printability.
Importing Your Model to a Slicer
To import your model to a slicer, export it from Blender as an STL file and then choose a slicing software like Cura to import the STL file. Here are some key considerations and steps to follow when importing your model to a slicer:
1. Exporting options:
– In Blender, go to File > Export > STL to save your model as an STL file.
– Choose the appropriate export settings, such as the desired units and scale.
2. Slicing software comparison:
– Research and choose a slicing software that suits your needs.
– Consider factors like user interface, features, and compatibility with your 3D printer.
3. Print speed optimization, support structure considerations, troubleshooting common printing issues:
– In the slicing software, adjust parameters like print speed to optimize the printing process.
– Consider adding support structures to ensure the stability and accuracy of your print.
– Troubleshoot common printing issues such as layer adhesion, warping, or stringing.
Optimizing Printing Settings for Successful Prints
To ensure successful prints, optimize your printing settings in Blender. Start by calibrating your print bed to ensure proper adhesion and avoid issues such as warping or uneven prints. Next, consider using a raft or a brim for better adhesion to the print bed. A raft is a layer of material that is printed underneath the object, providing a stable foundation. A brim, on the other hand, is a thin layer printed around the base of the object, increasing its contact area with the bed. Experiment with both options to find the one that works best for your specific print. Additionally, optimizing the infill density can help save material and printing time. Higher infill densities provide stronger prints, while lower densities reduce material usage. Fine-tuning support settings is also crucial, as supports are often needed for overhangs and intricate designs.
Adjust the support density and placement to minimize the use of support material while ensuring proper support for your print. Finally, consider post-processing techniques such as sanding, priming, or painting to enhance the appearance of your print. By optimizing these printing settings, you can achieve successful prints with Blender.